
When we bought our 35′ sailboat, Hope, in the summer of 2017, we knew our new vessel (and future home) would need a few components for added comfort and safety.
In other words, we were about to tackle some boat projects! 😂
For starters, because our travel goals involve heading to tropical climates, we wanted to make sure Hope has sun and rain protection for our cockpit and companionway—yep, a dodger and bimini.
We weighed the pros and cons of various options. After watching the cruising couple, Desiree and Jordan of Project Atticus, build their own hard dodger, we’d seriously considered this option because we liked the idea of a super sturdy bimini and dodger with potential, less upkeep in the future.
However, we decided against a hard bimini or dodger (at least for now) for the following reasons:
- Without being experienced cruisers (yet), we were less inclined to commit to a more permanent solution like a hard bimini or dodger before gaining more first-hand sailing experience and confidently knowing which features we’d want to prioritize most.
- Michael’s allergy to epoxy hardeners meant that we’d need to take extra precaution and this would require me (Esther) to do the epoxying off-site or opt for another material (like polyester resin). With our work schedules and lack of viable workspace (and we didn’t want to commit our budget to a storage unit at the time), we realized this option wasn’t ideal.
Out of curiosity, we requested a quote from a custom canvas shop when we lived in Georgia. They estimated $10-15K for a bimini and dodger, and we were like…

From Giphy.
That left us in search of more budget-friendly options. We browsed marine consignment shops for used bimini and dodger frames in Jacksonville, Florida, but couldn’t find any with dimensions that would work for our boat’s width (Hope has a 12′ beam).
Ultimately, after a ton of research and multiple conversations, we decided to go with a bimini frame and skin kit from Sailrite, a reputable company (founded in 1969) that offers DIY supplies and equipment for boats and homes.
So why Sailrite?
Pros:
- It’s a more affordable option in comparison to having a bimini custom made by a canvas shop. Here’s our breakdown of the cost to build our bimini:
- $813 (frame supplies and extra hardware)
- $551 (bimini skin kit with patterning fabric and thread)
- $172 (extra tools and sewing machine supplies for our Sailrite LSZ-1 machine)
- = $1536 total
- *Note: we needed a bit more fabric than what their usual Sailrite kit includes and a few other supplies to account for our wider dimensions, which added more expense. Also this total doesn’t include the cost of a sewing machine (we bought a used Sailrite LSZ-1 machine online last year).
- Excellent customer service and tutorials about using their products. Sailrite’s chat system is so pleasant and super quick. It’s been rare to experience stellar customer service like this! They offer plenty of video tutorials and ideas about DIY projects you haven’t even thought of yet.
- They have a solid reputation and it’s no wonder. Whenever we’ve talked with experienced cruisers or watched videos of sailors using Sailrite products, they seem to express their satisfaction with the end results.
- They clearly continue to make improvements to their products. Case in point, the carrying case for their Sailrite sewing machines. The case we have for our older model LSZ-1 sewing machine is okay, but it’s more susceptible to damage and feels a little precarious to carry because of the side buckles. Now, the latest carrying case seems much sturdier, with “aluminum edges and the corners are reinforced with zinc alloy end caps.” We’re saving up to upgrade ours, for sure!
- They are flexible and will work with you. On multiple occasions, we’ve asked if they’d consider letting us swap out an item or to buy part of a kit and get the rest later, etc. and the answer has always been yes. You can request a modified, personalized quote (i.e. want a different color zipper or additional parts) and they’ll oblige.
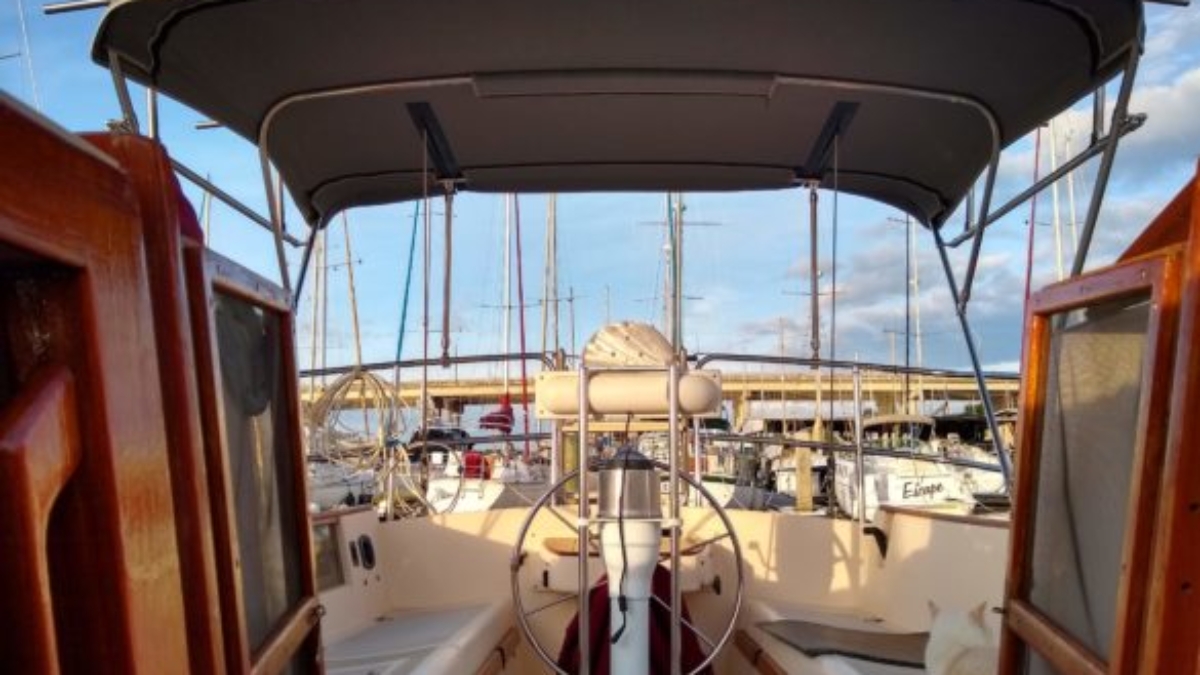
- Bimini frame and skin kit can be sized and assembled on the boat: We weren’t sure how feasible this would be, but after a few weeks of thinking about the design and final frame dimensions, we constructed the Sailrite bimini frame in a few hours over two afternoons right on the slip at the marina where Hope is currently docked. We also created the bimini pattern (using the Dura-Skrim material they recommend) right on the boat. It was a little bit of a struggle because of the breeze that day, but we did it. 🙌🏾
Making a dope bimini pattern using Dura-Skrim material.
Possible drawbacks:
- The tubing from Sailrite’s bimini kit comes cut down into sections for easier shipping, so the rigidity could be compromised a little (vs. a full-length of tubing). To reinforce our bimini, we chose to use additional hardware and rivets in key areas while still allowing us to be able to take the bimini apart in the future if necessary.
- If your boat has backstays, you’ll need to improvise a bit but Sailrite’s tutorial for a 3-bow bimini includes how to create backstay slits too.
Our backstay slits.
- Their steel tubing is what’s known as “marine-grade 304” stainless steel vs. “316,” which has more corrosion resistance (note: Sailrite’s deck hinges are all made of 316 though). Sailrite also offers tubing in aluminum as well, but we went with 1″ stainless steel. That said, Grade 304 for a bimini is likely more than adequate—it’s just that 316 offers more corrosion resistance and is especially recommended for any materials that will be “placed underwater or be exposed to water consistently,” (which a bimini won’t be). As an alternative, you could find 316 steel from, say, a steel distributor but expect to pay more for it (we looked into having tubing manufactured, but it was pretty cost-prohibitive for us). Plus, you’ll need to consider how to transport the longer pieces of steel tubing and make sure they’re bent according to your desired dimensions.
20-ish Tips for Making Your Own Bimini
If you’re thinking of trying out Sailrite’s kits or if you’re considering a different DIY option, we highly recommend watching Sailrite’s video tutorials because they’ll still offer insights about the process.
*Btw, our posts may contain occasional affiliate links. It just means we might receive a small kickback if you try out something linked from our posts, but there’s no added cost to you and we only share stuff we truly believe in. Note: We’re not sponsored by Sailrite.
- Michael dreaming of our future bimini fabric.
Bimini frame tips:
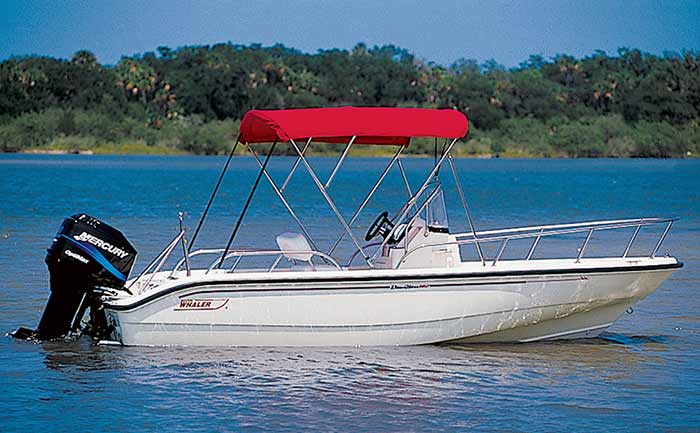
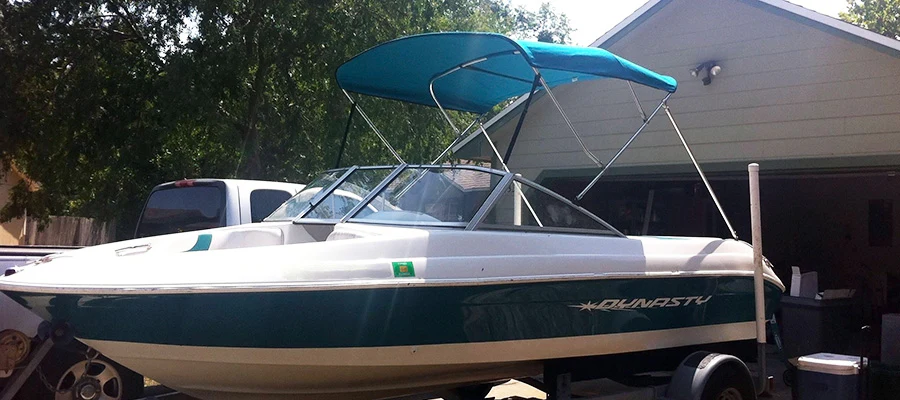
1) Look a ton at examples: Before you do anything, spend a good amount of time looking at different biminis online and in your area. Walk around marinas and think about your needs and preferences—what do you like, what you don’t. What are the tradeoffs? What makes the most sense based on your goals and budget? And check out articles like this one, “Redesigning Cockpit Canvas? 10 Ideas to Consider.”
2) Fabric choice: If you’re unsure about what type and color of marine-grade canvas you want for your bimini, then order a few samples—they’re affordable ($2/each) and well worth holding the actual fabric in your hands and seeing it on your boat. Here’s Sailrite’s selection guide to help you. After weighing different canvas options (like a lighter-weight one and a newer kind that was more expensive but came with a questionably shorter warranty), we decided on marine-grade Sunbrella, an industry standard.
3) Cutting down the steel tubing: We found that Reed’s Tubing Cutter was pretty quick to use (and way quieter for your neighbors). If you have a pipe cutter, before you get started, check that it’s able to take on stainless steel blades.
Reed Stainless Steel Tubing Cutter
4) Riveting: Before riveting stainless steel pieces to each other, make sure to sand off any burrs from the ends. After trying out a couple of crappy rivet guns (the ones sold in big box stores, for instance), we finally found one that we’re happy with now: Marson 39000 HP-2 Hand Rivet Tool.
5) Build it directly on the boat or on a frame: We preferred building the bimini frame and pattern directly on the boat (vs. building on a wooden frame, plus we didn’t have the indoor space to build a frame elsewhere anyway). At first, we thought this would be a disadvantage, but as it turns out, building directly on the boat allowed us to see the bimini lines and make adjustments as needed (i.e. we made our secondary bow 4″ wider than the primary to follow the shape of the combing. We also could live with the frame setup for a while, try things out, and look at it before we truly committed and went onto next steps.
From Sailrite’s bimini video tutorial.
6) Intermediate bow: We made the intermediate bow a little higher for rain to run off (this is also suggested in the respected text, Canvas for Cruisers, by Julie Gifford) and we feel it’s aesthetically pleasing too.
Canvas for Cruisers by Julie Gifford—a must-read book for cruisers!
Bimini skin tips:
1) Prep your sewing machine: Before starting any big sewing project, make sure to test your machine settings (and oil parts if needed) and try sewing on comparable pieces of test fabric first! We also recommend watching these troubleshooting videos below first too (we could’ve saved ourselves frustration and time if we had started this way ourselves), so you’re aware of common mistakes or sewing machines issues that could come up.
We’ve bookmarked these resources and we referred to them often:
2) Oil your machine: Watch Sailrite’s “Maintenance & Lubrication” video and do as they say by lubricating your machine beforehand if you haven’t in a while.
3) Practice sewing: As Captain Chris Caswell suggests in “Do-It-Yourself: Fashioning Canvas Covers For Your Boat”:
Before you start sewing on the real project, practice (a lot) on scrap material. Learn to control the speed of the sewing machine, practice sewing straight lines, and understand how to use forward and reverse to over-stitch the thread at the start or end of a seam. Probably the most important skill is learning to sew across a seam, especially one with multiple layers of fabric. For the most part, covers are made using straight stitching, so you won’t yet have to bother with zigzag stitch patterns.
4) Watch the Sailrite bimini video tutorial at least a few times before cutting anything. If this is your first bimini-sewing rodeo (as it was for us), it helps to familiarize yourself with the process, names of bimini sections, and how they come together.
We found that watching—and re-watching (and re-watching the relevant clip again) was super helpful. In fact, if were to do this again, we would’ve opted to make the paper prototype at the beginning of the process (Sailrite recommends this later in the process around 41:30 in the “joining the panels” section of their tutorial). 🤠
5) Get handy tools: For sewing the bimini, we underestimated these Sailrite tools at first, but now we’re huge fans since they make the bimini process easier (plus you can use them for future sewing projects):
- Patterning ruler (all-around handy tool for drawing lines and circles on your fabric)
- Seamstik basting tape (makes sewing hems and seams easier)
- Soapstone pencil (lets you temporarily mark up or pattern on your canvas)
- 1″ Swing-Away Binder (okay, we tried to skimp here at first by buying a more affordable one on Amazon, but it didn’t swing away and didn’t properly mount so that the binding would lay flat, which was super annoying. We ended up ordering Sailrite’s product, which we wished we’d done in the first place, and we highly recommend it.)
6) Consider getting extra fabric: Because our fabric choice (Sunbrella Smoke) only comes in 46″ width (vs. 60″) and since our measurements for the forward and aft patterns were wider, we couldn’t cut the sleeves out of the remnant scrap (like Sailrite’s tutorial recommends). Luckily, we bought extra yards of fabric so it’s something to think about if your boat is beamy, if your bimini is wider than Sailrite’s example in their video, or if your fabric choice doesn’t come in 60″.
Transferring our bimini pattern onto the fabric.
7) Hot knife selection: Get one in advance and test it out. We realized ours works just okay. We’d ordered a more affordable soldering iron from Amazon to save on costs but we wouldn’t recommend it.
If you plan to do a lot of DIY projects, you might want to consider Sairite’s hotknife or one that’s heavy duty like it. If we could go back, we would consider just getting Sailrite’s 110V hotknife from the start (in spite of the upfront, higher cost).
Spreading out indoors on a floor is ideal so you don’t have to contend with wind, but that said, we used the hot knife both indoors and outdoors just fine. Protect flooring by placing a large piece of cardboard under the fabric.
8) Facing strips: For the “facing” strips (see Sailrite’s diagram below), we found it helpful to leave a few extra inches to the ends of them, just in case, since we could cut off what we didn’t need later.
From Sailrite’s bimini video tutorial
9) Thread choice: We opted for Profilen thread because it lasts much longer (comes with a lifetime guarantee!) vs. the more commonly used V-92 Polyester thread, which Sailrite estimates would last “up to 10 years outdoors in mild climates and 2-3 years in a harsh environment.”
This blog post, “Life of UV Thread in the Tropics,” by Troubadour’s Linda Moore and Chris May, includes their story about switching to Profilen thread and also features quotes from Matt Grant at Sailrite about thread options:
Here are some facts: Polyester thread (like the Ashes) loses over 60% of its breaking strength in the first year of use. Profilen and Tenara don’t lose any strength in the first three years. Black or white are the best colors of Polyester to use – they won’t fade quickly and they last longer than other colors. Profilen and Tenara are very expensive when compared to Polyester thread of equivalent sizes.
That said, we admittedly found that the Profilen thread was a bit more challenging to work with at times. We ran into more troubleshooting issues with our sewing machine, but we’re not sure how much of this was necessarily due to the thread choice vs. other factors. While the Profilen is definitely pricier, a little goes a long way and we’re glad we opted for longer-lasting thread for our bimini.
10) The right needles: Make sure to get the appropriate-sized needles based on your thread, fabric type, and sewing machine (check out Sailrite’s Thread and Needle Recommendations). We ended up trying the #20 needle, then moving to a #18 (and we’ve read about #16 being used too with Profilen thread).
11) Test fit your bimini when possible: Do at least one test fitting (preferably more) of your bimini once you have sewn the pockets (or sleeves) on and especially if you’re sewing slits for your backstays.
12) “Stop points” for backstay slits: If you’re needing to create backstay slits for your bimini, keep in mind that Sailrite’s video tutorial and paper instructions refer to “stop points,” which we almost assumed referred to the point where the backstay would go through the fabric. Wrong! Thankfully, we realized our mistake in time. We highly recommend that you watch this section of the bimini video tutorial at least couple times, along with the following sections about the zipper plaque to minimize confusion (from 1:38-1:56).
13) Zippers: When ordering zippers for your bimini, make sure to get the appropriate zipper pull (Vislon vs coil). We mistakenly ordered a coil one when we needed Vislon. Doh!
Are you happy with your DIY bimini?
In total, we spent about 45 hours building our bimini (spread out over several weeks): 8-10 hours building the frame (this doesn’t include the initial weeks of research and strategizing) + 35 hours on the bimini skin skit (not including about 8 hours of troubleshooting the sewing machine on a particular day).
Michael puts his geometry and trigonometry skills into action.
We can honestly Sailrite as a company does so many things right that it feels good to sing their praises. We’re happy to support them and would definitely recommend their bimini frame and skin kit.
And yes, we’re ecstatic to have our new bimini! 🙌🏾
If you found this post helpful, please consider subscribing to our video stories where we often are tackling various boat projects or sign up to join our e-newsletter gang where we share posts like this one. Thanks, everyone!